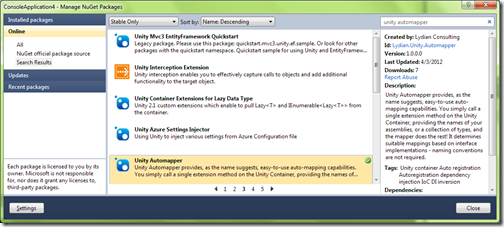
Although it’s pretty self-explanatory, I thought that some simple instructions how to use the Unity Automapper might be a good idea anyway.
Installation
If you’re reading this, there’s a good chance you’re coming here from the link in NuGet’s description, in which case you can skip straight to the Usage section below. Otherwise, read on…
- Fire up Visual Studio and open your solution.
- Open NuGet on the project you wish to perform the Unity registrations on (typically this will be your startup project)
- Search for Unity Automapper. NuGet isn’t the best at finding packages so you might have to search for it a bit.

- Alternatively you can simply install it via the Package Manager Console with the command.

- That’s it! You’re now ready to start using the AutoMapper!
Usage
This is even easier.
- Add a using statement to the top of your source file where you want to perform the registration on.

- Create your Unity Container as normal.
- If you have a list of types at compile-time that you wish to use as the source of registrations, simply call the AutomapTypes() method: –

- Alternatively you could just chuck in all the types in e.g. your executing assembly at run-time: –

- If, on the other hand you’re using a more plug-in style architecture where e.g. you want to source your registrations from assemblies that your registration project doesn’t have a reference to, or you want to map concretes that are internal to another assembly etc., you can just provide the assembly names using the AutomapAssemblies() method: –

- So in this example, perhaps we have an interface in our Services assembly e.g. IDataAccess, which is implemented by a class in DataAccess. You can now make the concrete implementation completely private; it’ll simply be found by the mapper and wired up.
That’s it! Either of those calls will perform any mappings that it can find into Unity; you’re now ready to go.
Other features
Here are a few other features that the mapper offers…
- If you want to make your data access layer a singleton in Unity, simply mark the interface (not the implementation!) with the [Singleton] attribute (this necessitates referencing the Automapper from that assembly as well).

- If you want to specifically ignore a type from the Automapper – perhaps you have a fake class you sometimes turn on or use in testing etc. rather than when really running – just mark it with the [DoNotMap] attribute.

That’s pretty much it. Two method calls and two (optional) attributes – not a massive API but hopefully one that saves you some time when using Unity.

Nice. Unlike most other containers, auto-registration is missing from Unity which is a real shame. There are a couple of other nuget packages that add this functionality. I don’t know how the features compare between them all. Maybe worth looking into?
UnityConfiguration
https://github.com/thedersen/UnityConfiguration
Unity Auto Registration
http://autoregistration.codeplex.com/
I did actually look at them (albeit somewhat briefly). What I wanted to achieve with this is something that is a very simple to use API that doesn’t auto map everything but gets at least 80% of your wireup done. Look at the size of those APIs compared to mine – undoubtedly they offer more but I want something that’s more accessible, particularly for someone that’s a beginner to using DI etc.. I’ve got lots if ideas for how to make it more powerful but am really trying to keep the API dumb.